I use SharePoint PnP PowerShell cmdlets almost every workday, to do a lot of customization and administrative tasks. I guess, no introduction is needed about PnP PowerShell with its huge usage and popularity.
Now, if you are a user like me who is working on different versions of SharePoint, 2010, 2013, 2016, 2019 & Online (Yes. I still manage SharePoint 2010 sites :S), using the right PnP PowerShell module to target the SharePoint version is tedious.
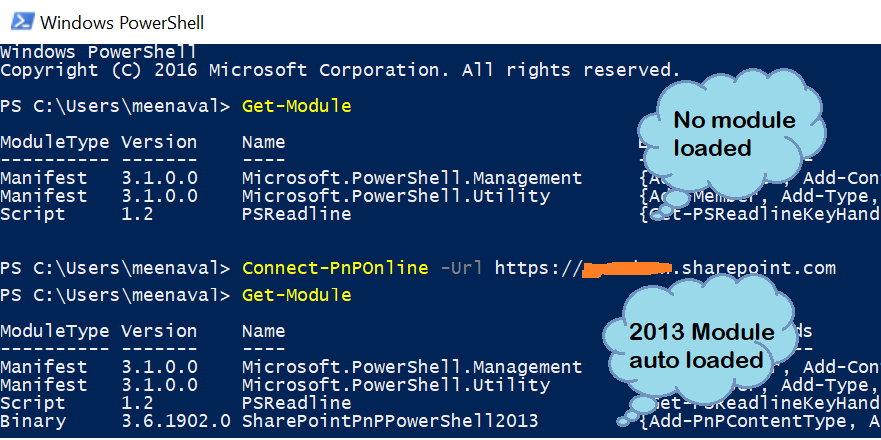
When you install different PnP PowerShell modules (i.e., 2013, 2016, 2019 & Online), we have a cmdlet name conflict because all the modules have same name for the cmdlets. And none of the modules are loaded initially when you open a PowerShell session.
How are the modules loaded? When you first run any PnP PowerShell cmdlet (obviously Connect-PnPOnline), the PnP PowerShell module is automatically loaded
Which module (2013, 2016, 2019, Online) is loaded? When you have different modules installed, PowerShell picks the modules to load from the default modules path (in environment variables). As this appears to be alphabetical, 2013 module is loaded by default in my case.
This blog from Christ Kent, explains on how to target different versions of SharePoint PnP PowerShell by changing the PSModulePath in environment variables, and using Import-Module whenever we need to target for a different version of SharePoint.
Here is another approach. Isn’t it cool to have different icons like this to target the PnP PowerShell module for the specific SharePoint version?
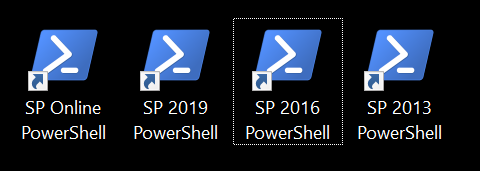
These are desktop shortcuts for PowerShell specifying which module to load using the shortcut parameters. This way, I can easily open a PowerShell session for the respective SharePoint version without the hassle of typing Import-Module cmdlets always.
How to do this?
- Right click on your desktop to create a new shortcut
- In the create shortcut window, in the location of the item text box, type the following command.
C:\Windows\System32\WindowsPowerShell\v1.0\powershell.exe -NoExit -Command "Import-Module -Name 'C:\Users\ram\AppData\Local\Apps\SharePointPnPPowerShell2016\Modules\SharePointPnPPowerShell2016\SharePointPnPPowerShell2016.psd1' -DisableNameChecking;"
And click next. This basically specifies that we open PowerShell and load the module targeted for SharePoint 2016.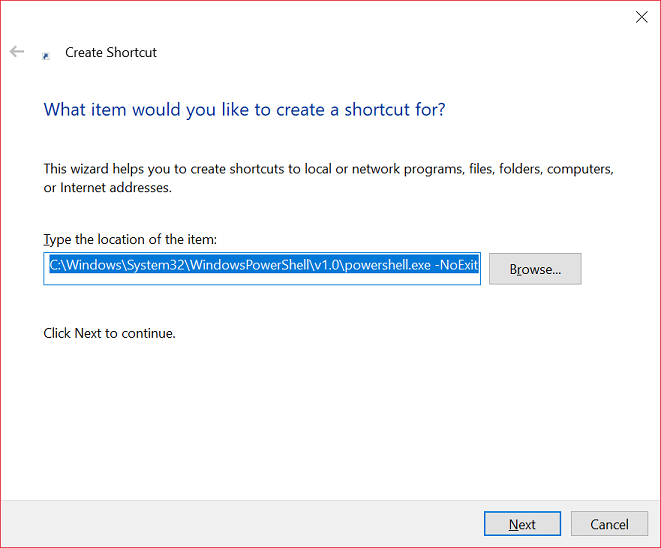
- Type the name (target version of SharePoint) and click finish
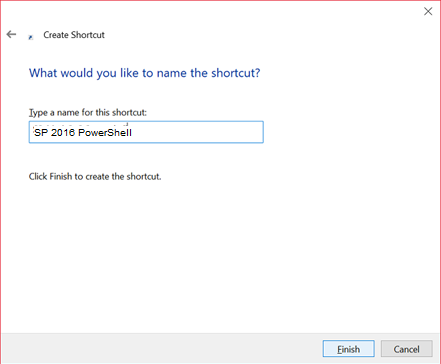
Now, whenever I open PowerShell with this shortcut, I am ready to write cmdlets for SharePoint 2016. Similarly I keep 4 different shortcuts for 2013, 2016, 2019 and SharePoint Online which is handy, as I dont have to run the Import-Module cmdlet whenever I need to target a different version of SharePoint.